Ad1

Showing posts with label Basics. Show all posts

Thursday, 17 July 2014

Homemade Garam Masala (All spice powder)


Garam Masala is a very common and important spice blend in any Indian household. I have seen my grand mother preparing it, then my Mother and now me. I am preparing this since a long time and very very satisfied with the taste and aroma both. 


We get it very easily in market but taste is never guaranteed. There are various recipes for Garam Masala but I am following my Mother's recipe to the T.


There are many spices involved in this, many recipes include coriander seeds as well, but I prefer to add coriander separately in my gravies, hence don't add. I make it in small batches for a month only, this way it remain fresh. It hardly takes much time to prepare. If you are making it in a big batch then off-course you can, just store it in small airtight containers. Usually when I was in India, I used to keep them in strong sunlight for an hour or two and then used to grind them. But here in London I dry roast them due to lack of sunlight.


Adding a little of it to any curry or gravy takes it to another level. So lets quickly see the ingredients following the method.

Ingredients :
  • Cumin Seeds : 1.5 tbsps
  • Caraway seeds/shahi jeera : 1 tbsp
  • Cloves : 1 tbsp
  • Bay leaves : 6-7
  • Green Cardamom : 1 tbsp (25 approx)
  • Black Cardamom : 6
  • Black Pepper corns : 1 1/2  tbsps (you can adjust it)
  • Nutmeg : 1/2 
  • Star anise : 2 small (optional)
  • Cinnamon Sticks : 4-5 of 3" each
  • Mace/Javitri : 2-3
Method :
  • Dry roast all the ingredients or keep them in strong sunlight for couple of hours.
  • Now let them cool and grind them to a fine powder.
  • Store in an airtight container.
Note :
  • If you want to add coriander seeds to it, then simply add 1/4 cup of coriander seeds to this ratio.
  • If you are adding grated nutmeg, then no need to dry roast it, simply add it in the end and mix well.
Enjoy!!!!!!


Please do share your experiences and feedback with me in the below section of comments or on my Facebook page. I too have a You Tube channel please do visit for all the video recipes. All the links mentioned below :) 
Facebook : https://www.facebook.com/cookwithpriyanka

Thanks & Happy Cooking
Priyanka

Thursday, 10 July 2014

Homemade Kadai Masala Powder


Hello everyone, today I have you all a recipe of Kadai masala powder. Its very well used in various kadai preparations whether vegetarian or non-vegetarian. You can make this and store in an air tight container for 2-3 months. 

Video link :


Ingredients :
  • Coriander seed : 1 tbsp
  • Black pepper corn : 1/2 tsp
  • Cumin seeds : 1 tsp
  • Whole red chillies : 2-3
  • Cloves : 4-5
  • Green cardamom : 2-3
  • Black cardamom : 1
  • Cinnamon stick : 1/2 " stick
  • Bay leaves : 1-2

Method :
Dry roast all the ingredients on a low flame. Once you start getting the aroma and the spices are done, coarsely grind them in a spice grinder as shown in the video. Store it in an air tight container.

Please do share your experiences and feedback with me in the below section of comments or on my Facebook page. I too have a You Tube channel please do visit for all the video recipes. All the links mentioned below :) 
Facebook : https://www.facebook.com/cookwithpriyanka

Thanks & Happy Cooking
Priyanka

Wednesday, 25 June 2014

Indian Chicken curry


Hello Everyone, today I have got a recipe for a very delicious and lip smacking chicken curry. Made up with the regular spices it has the most authentic taste. Its the way I am preparing it since many years and always liked by everyone. Its a very good option for a get together as well. I always keep this in my menu when Guests are arriving home. Its an easy and simple way to impress others :)))
There is no marination required hence saves time, also prepared in less oil :). Lets quickly dig into the ingredients following the method.

Video link :

Ingredients :
  • Chicken on bone : 500 gms
  • Onions : 2 medium sized (finely chopped)
  • Tomatoes : 2 medium sized (pureed)
  • Ginger : 1 tbsp (minced)
  • Garlic : 1 tbsp (minced)
  • Bay leaves : 2 nos
  • Cloves : 4-5 nos
  • Cinnamon stick : 1.5" long
  • Red chili powder : 1 tsp
  • Kashmiri red chili powder : 1 tsp
  • Turmeric powder : 1/2 tsp
  • Coriander powder : 1 & 1/2 tsp
  • Garam Masala powder : 1 tsp 
  • Dried fenugreek leaves/kasuri methi : 1 tbsp
  • Yogurt : 2 tbsps
  • Oil : 2-3 tbsps 
  • Fresh coriander (handful)
  • Salt as per the taste
Method :
  • In a hot pan (try to take deep bottom pan) add oil, then add the whole spices - cinnamon, bay leaves and clove. Let them release their flavor in oil then add onions and saute till you get a nice golden brown colour. 
  • Add the washed chicken pieces and fry till the chicken changes its colour. 
  • Then add all the dry spices - red chili powder, turmeric powder, coriander powder, kashmiri red chili powder (for reddish colour) and 1/2 tsp of garam masala (rest of it we will add at the end). Give it a mix and add the salt as well.
  • Add pureed tomatoes and saute until oil oozes out.
  • Then add yogurt and mix well. Add water, cover and let it simmer unless the chicken cooks.
  • Once cooked well, add rest of the garam masala, dried fenugreek leaves and mix well. 
  • Garnish with fresh coriander leaves.
Enjoy with hot phulkas, rumali rotis or steamed rice :)

For the Rumali roti recipe please click here
 
Note : 
  • You can add ginger/garlic paste instead of minced.
  • The authentic way to prepare it is with Mustard oil, but here I don't get it of a good taste hence I used olive oil.
  • Chicken's cooking time varies from place to place, it took only 10-15 minutes for my chicken.
Please do share your experiences and feedback with me in the below section of comments or on my Facebook page. I too have a You Tube channel please do visit for all the video recipes. All the links mentioned below :) 
Thanks & Happy cooking 
Priyanka

Monday, 9 June 2014

Crusty Oats & whole wheat herbed Buns (Eggless)


Hello everyone, today I have got one of my trial recipe which came out perfect in one go and very much appreciated by my husband too. These days in CAL (Chef at Large) we all have a yeast mania, and our groupmates are playing with it and preparing various kinds of yummilicious breads. So just thought to do an experiment and viola!!!! it knocked quite well. 

 
These are the crusty buns which I made up with oats flour, combining it with whole wheat and plain flour (for gluten). They have a hard crust outside and soft inside. Also I added some herbs which took them to a next level. 


I served them with Tomato,carrot & coriander soup and couscous salad, believe me it was an out of world kind of lunch. They are so delicious that will be very often now made at our place. So lets look into the ingredients following the method.


Ingredients :
  • Strong whole wheat flour : 1 + 1/2 cups (Strong means that it should have a high protein content approx 13-15 gms) If not available then use normal chapati flour.
  • Plain flour/All purpose flour/Maida : 1 cup
  • Oats flour : 1 cup (Grind quick/old fashioned oats)
  • Dry active Yeast : 1 tbsp
  • Sugar : 1 tsp
  • Salt : 1 tsp
  • Olive/veg oil : 3 tbsps
  • Garlic powder : 1 + 1/2 tsps (If not available, then use 1 tsp of freshly grated garlic)
  • Italian mixed herbs : 1 tbsp
  • Lukewarm Milk : 1/2 cup + 3 tbsps for milk wash
  • Lukewarm Water : 1/2 cup 
  • Sesame seed : 1 tbsp (optional)
  • Butter : 1 tbsp 
Method :
  • Combine together yeast, Lukewarm water and sugar in a bowl, stir and keep aside for 10-15 minutes or until it starts to froth.

  • In another mixing bowl, mix together oats flour, whole wheat flour, all purpose flour, herbs, garlic powder and salt.
  • Pour in the yeast mixture and try to combine, add little by little warm milk  and make a sticky dough. This is how the dough should look like as in the picture. 
  • Apply a little oil over the palms and take out the entire dough over the working surface. Knead for 7-10 minutes. You can use oil rather than using dry flour if its sticking a lot. After sometime you will see that it has formed up with gluten which results into a soft dough (it will be sticky at this stage well, but that's absolutely fine)
  • Place the dough in a large greased bowl and brush the top with oil, cover with a kitchen towel and leave aside to rise in a warm place until doubled in volume. The best place I find is my oven keeping its light on (for about 1-1 1/2 hours).
  • Once risen punch down the dough and divide this into 8 equal parts and shape them into smooth flat balls. The texture will not be very smooth.
  • Place them onto a lightly greased baking tray lined with aluminum foil. Cover & leave in a warm place until doubled in volume.
  • Once done brush them with milk wash and apply sesame seeds.
  • Preheat oven to 190 ° C  and put a pan/tray filled with boiling water on the lower rack (For steam in the oven). Bake the buns for about 25-30 minutes or until the tops are lightly browned.
  • Take out from the oven and apply butter, keep them onto the cooling rack and they are done.
Tips :
  • Be patient while frothing the yeast and also proofing the dough.
  • Adding herbs & garlic is optional or you can add the flavours of your choice.
  • Don't apply a lot of dry flour while kneading the dough, this may lead to dense buns. 
Please do share your experiences and feedback with me in the below section of comments or on my Facebook page. I too have a You Tube channel please do visit for all the video recipes. All the links mentioned below :) 
Facebook : https://www.facebook.com/cookwithpriyanka
 
Thanks & Happy Baking
Priyanka


Sunday, 18 May 2014

Coconut Macaroons


Coconut Macaroons are closer to a cookie than its meringue cousin, and is equally sweet. They have a nice crust and chewy inside. I heard a lot about Coconut Macaroons and always thought that they are very fancy and can only be bought from a bakery. Never ever thought to prepare them at home. 

 
Once I was going through a recipe of Ina Garten and found it to be not so difficult and quick to make. The original recipe contains Condensed Milk + Coconut + Egg whites, but making some changes I totally omitted the Condensed milk part and made them with sugar. Few recipes also add almond meal to it. There are many methods to prepare them. Few beat the egg whites to the stiff peaks and then fold in the coconut and sugar and many more. But I got a very easy and simple way to prepare it for you guys. There are various varieties of coconut macaroons these days - like chocolate, nuts etc.
So lets quickly see the ingredients followed by the method.

Ingredients :
  • Castor Sugar - 1 cup
  • Dessicated Coconut - 2 + 1/2 cups
  • Egg whites - 4 egg whites (large eggs, if medium then 5)

Method :
  • In a  big bowl whisk sugar & egg whites just to mix well.
  • Now add in the coconut and again mix.
  • Transfer the mixture to a pan on medium to low flame and continuously stir it. (Make sure to stir continuously as if not then the egg might cook to a scrambled egg and we don't want that)
  • After sometime you will observe that the moisture has dried out a bit. Just close the flame and let the mixture rest for 5 minutes. (make sure that the mixture is not too runny, if yes then cook it for some more time)
  • Now take a plastic sheet piping bag or make your own, fill it with the mixture, cut a little big hole. 
  • Pipe on to a baking tray lined with butter paper.
    Bake it in a preheated oven at 160 ° C for 20-25 minutes or unless they get a nice golden brown color.
  • Once done, take them out and let them sit in the baking tray for 5 minutes. Then transfer to a cooling rack and let them cool completely.
Once cooled, store them into an air tight container and enjoy !!!!!

Note :
They are very easy to prepare, but few things have to be kept in mind -
While cooking the mixture, stirring continuously is very important
While baking, once they start changing color keep an eye, as they might get a very dark color soon.

Do share your experiences and feedback with me in the below section of comments or on my Facebook page. I too have a You Tube channel please do visit for all the video recipes. All the links mentioned below :) 


Thanks & Happy Baking
Priyanka :)


Thursday, 15 May 2014

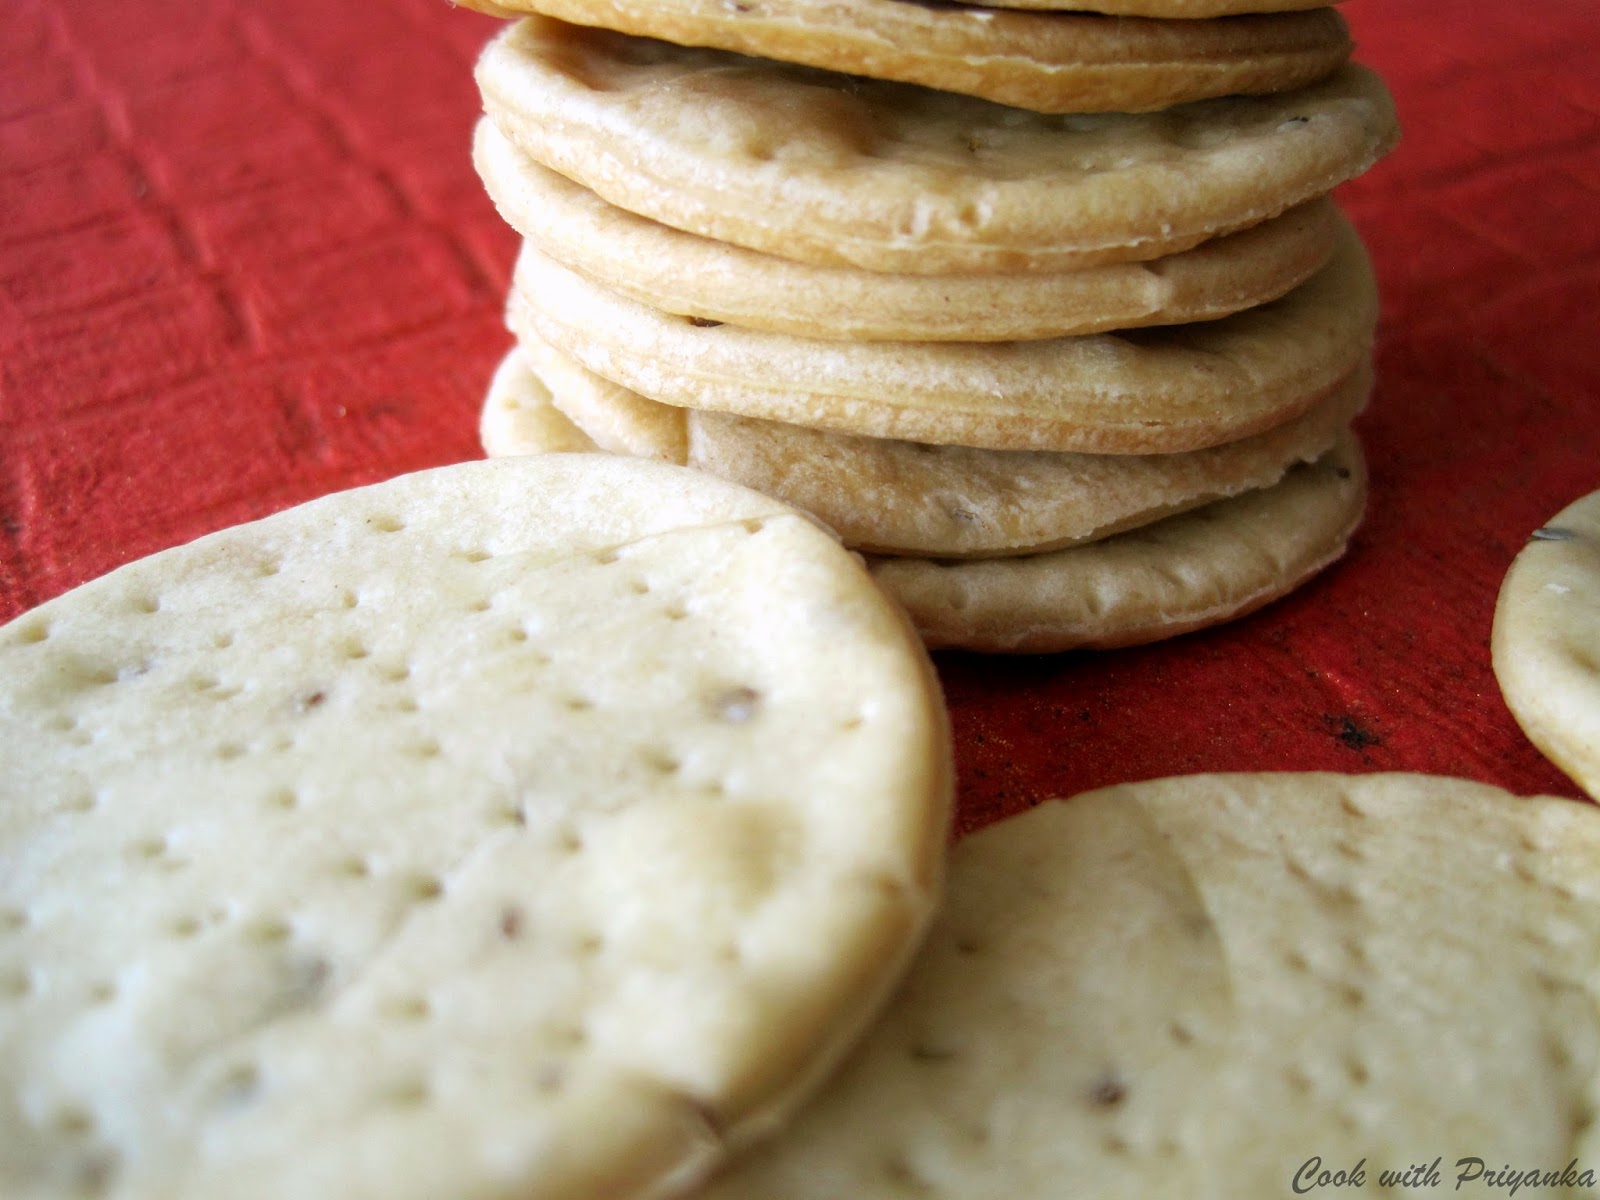
Baked Papdi/Baked crackers

These days I am on a mission of healthy snacks which have a longer shelf life and can be enjoyed guilt free. In our Indian homes, the most famous snacks are mathri, but........they have huge amount of ghee in it :((((, I can't even imagine the number of calories they have!!!!!. But at the same time they are so so addictive that one can't resist to have just one :))).  This is human tendency I believe, the food which is unhealthy is loved most and we always don't prefer healthy ones :). One fine day we friends were discussing about the same on a group chat, found that most of the people have green tea but just as a sake to have it and never preferred it above their proper Indian ginger tea :))). But at the same time there are many more who love to have it, I am among them.

I have a habit of munching something after every 2-3 three hours, need some biscuits, flakes or anything. If I have anything which is high in calories and have high fat content, then I am gone. So therefore I planned to have healthy snacks with full of flavours. Sushant's colleagues demanded for some Indian samosas (proper aloo one). So I prepared in a very large batch and was left with some dough. My mother always used to fry mathris from the left over dough and I am sure you all too do the same thing :)))). But I gave a new twist to it and just baked them and voila the results were outstanding - crisp, crunchy and light. Goes amazingly good with a cup of tea. As it was from the samosa dough hence made from Maida/ All purpose flour, but next batch I will prepare from whole wheat flour and soon share the results. So here is the recipe, its quite simple and easy to prepare, hope you all will like it too.

Ingredients :
  • All purpose flour - 1 cup
  • Vegetable oil - 2 tbsps (I used Olive oil)
  • Carom seeds/Ajwain - 1 tsp
  • Salt as per the taste
  • Warm water - 1/4 cup (to knead the dough)

Method :
  • Mix all the ingredients (except water) in a big bowl. 
  • Now add little by little water, we need to have a stiff dough (not very soft). You can always adjust the amount of water. Once done cover and allow it to rest for 30 minutes.
  • Now divide the dough into two parts and roll like thin chapati. With the help of a cookie cutter or a bottle's cap cut into desire shape. Place them on baking tray, lined with butter paper/aluminum foil.
  • Bake them on the middle rack at 180 ° C for about 18-20 minutes, do flip them in between. Mine were done in exactly 20 minutes but every oven varies in terms of power hence would advise to keep an eye.
  • Also if u want dark brown color, then put them on broil (on the top rack with temperature 220 ° C) for just 30 sec. But make sure that you don't move from there as they might burn.
  • Take them out from the oven, let them rest in baking tray for 5 minutes and then transfer on to a cooling rack. Once completely cooled store them in an air tight jars. These will remain good for a month.
  • Now prepare a nice cup of tea and have them with a cute smile :)
Note : You can add flavours of your own choice like - chili flakes, kasuri methi/Dried fenugreek leaves, Italian herbs too if you like :)


Do share your experiences and feedback with me in the below section of comments or on my Facebook page. I too have a You Tube channel please do visit for all the video recipes. All the links mentioned below :)


Enjoy making them :)

Thanks & Happy Baking
Priyanka :)


Monday, 31 March 2014

Pizza Dough


A very easy to make pizza dough at home. Make pizza or just enjoy a loaf. The dough gives a perfect crust for the pizza. Thin or pan it depends on the choice with this no fail recipe.

Ingredients for the dough:
  • All purpose flour/plain flour (Maida) : 1 cup
  • Dry Active Yeast : 3/4 tsp
  • Milk (luke warm) : 1/2 cup
  • Water (luke warm) : 1/2 cup (quantity will be adjusted as per the dough)
  • Sugar : 1/2 tsp
  • Salt : 1/2 tsp
  • Olive oil/Veg oil : 2 tbsps

Method for preparing the base dough:
Activating Yeast
  • Mix sugar and yeast in Luke warm milk. Cover and keep aside for 10-15 minutes depending on the room temperature. After sometime you will see that the mixture has become very frothy. This is the indication that your yeast is activated.
Kneading the dough :
  • Sieve flour in a big bowl, mix salt to it. Add yeast to it and try to collect all the mixture together and knead a soft dough. At this stage you can add luke warm water as per the dough. The dough need to be very soft and sticky. 
  • Once combined well add oil. 
  • Put the dough on the work surface and knead for 5 minutes. (You can dust it with some flour while kneading)
  • Keep the dough in well greased big bowl and cover with cling film or wet kitchen towel. Keep it in a warm place for 1-1/2 hr or unless the dough is doubled in size. (The best place which I find is oven with the light on).
  • Once the dough is risen, its ready to roll.

Note : Below pictures here are just to give a rough idea. Quantity of the ingredients is totally different.


Thanks n Happy Baking 
Priyanka :)

Homemade Pizza sauce/Italian sauce


Pizza sauce is extremely easy to make and just need very few ingredients. Its fresh and preservative free. The best part is that you can customize the flavors as per your likings. I am preparing this sauce since years and must say its a no fail recipe. So lets quickly run through the ingredients following with the method.

Ingredients :
  • Fresh tomatoes (puried) : 1 cup
  • Concentrated puree : 1 tbsp/Normal Puree : 2 tbsp
  • Tomato Ketchup : 2 tbsp
  • Minced Garlic : 2 tbsp
  • Finely chopped Onions : 1/4 cup
  • Chilli Flakes : 1 tsp
  • Oregano : 1 tsp
  • Basil : 1 tsp
  • Corn flour : 1 1/2 tsp
  • Oil : 1 tbsp
  • Sugar : 1 tbsp
  • Salt to taste
 Method: 
  • Heat oil in a pan, add minced garlic, as soon as the rawness is gone and they are little golden add onions and fry till they become little golden. 
  • Add tomato puree and cook until it becomes thick.
  • Add the concentrated puree with ketchup, herbs, salt, chilli flakes and sugar.
  • Prepare corn flour slurry and mix in the tomato mixture.Cook for 1-2 minutes.
  • Remove from flame and let it cool at room temperature.
Note : Below pictures here are just for the reference (a rough idea). Quantity of the ingredients is totally different.


You can store pizza sauce for 4-5 days in the refrigerator.
Enjoy it with your pizzas, loaf or just with the chapattis as chutney. 
Thanks n Happy cooking
Priyanka :)

Tuesday, 18 March 2014

Homemade Mawa/Khoya/Thickened milk


Mawa also known as khoya/khoa, is one of the very well known ingredients used for preparing many of the Indian sweets like Gulab Jamuns, Peda, Gazar ka halwa and many more. Its kind of ricotta cheese with very less moisture. Its very easily available in Indian markets but very rare to find if you are in some western countries. If its available also then its not fresh. Hence I prepared it in home this time. I prepared it with the traditional way. Its very easy to make but yes its quite time consuming and this is the reason that people prefer it to purchase from outside.

Ingredients :
We just need 2 liters of whole milk (full fat) 

Method :
  • In a heavy bottomed pan (preferably nonstick pan), pour the entire milk and heat. Once it comes to a boil, let it simmer and reduce on medium-low flame. 

  • Keep stirring after every 2-3 minutes. Scrap down the bottom continuously. It will take 40-50 minutes to get the milk thickened. 

  • Once it becomes grainy don't leave it and scrap the sides & bottom continuously. Keep cooking unless it becomes a bit hard. It took approximately 1.5 hours for me. When done transfer it to a bowl or plate and let it cool completely. On cooling it will become harder.
You can keep it in refrigerator for 4-5 days.

Thanks n Happy cooking
Priyanka :)